If you’ve been following this site, you’ll know that I’ve been going through lots of alternatives in trying to achieve the Holy Grail of home automation, which is to get my garage door to open remotely with a Raspberry Pi. To this day, I haven’t managed to do that, but I did get some great guides going.
For example, I managed to turn the Raspberry Pi into an infrared remote and control my TV and AC unit with it, and, after that, the next step was to control RF wall sockets, which was also great.
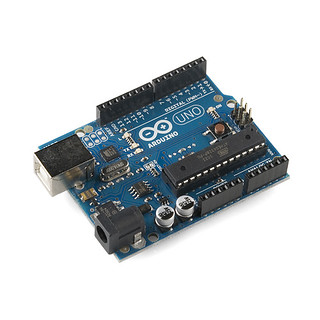
After all this, I connected my house lights to RF sockets so I can control them from the Pi, but having a Pi running all the time is a bit of a hassle. It requires an SD card, a USB hub for the wifi, it freezes sometimes, etc, so I wanted a solution that was less of a complete PC. The obvious choice was an Arduino, especially since I already have a home server always on, which can send commands to the Arduino for execution.
Using an Arduino for remote control
The Arduino is pretty similar to the Pi as far as outputs go, so connecting stuff up to it is exactly the same, so all that needs to change is the software side. Fortunately, the Arduino (being a microcontroller) is much more real-time than the Pi, so you can time signals pretty accurately just by using delayMicroseconds, so it should be easy to send timings-based PWM signals with it.
I found libraries like Arduino-IRremote that use something LIRC-like to send keys, but it seemed like it could only send keys from the Arduino itself (rather than send arbitrary keys that were sent to it by USB), and it also includes a lot of code to encode various infrared-remote-style keys. I don’t need any of that, so I decided to roll my own.
Transmitting signals manually
As I said, transmitting signals with the Arduino is pretty straightforward. Just set the pin to high and wait the necessary amount of time. Here’s a part of some sample code to do it:
for (i = 0; i < 20; i++) {
    if (status == HIGH) {
        status = LOW;
    } else {
        status = HIGH;
    }
    digitalWrite(pin, status);
    delayMicroseconds(message[i]);
}

// Reset, just in case.
digitalWrite(pin, LOW);
Since I only need to send raw timings, this is more or less enough. However, I also need something to send the timings from the computer to the Arduino. The next section deals with that.
Sending the timing data to the Arduino
To send the timing data, I initially used an ASCII encoding, sending strings manually with picocom, and used the Messenger library to parse the ASCII strings into integers for the timing data. Unfortunately, the Arduino doesn’t exactly have gigabytes of memory, so this didn’t work. I’m assuming strings were too memory-intensive, because it could handle only strings up to length 60 or so before behaving erratically.
Since that proved unreliable, I used a simple encoding of my own devising. It’s pretty simple (it’s hardly an encoding at all): The timing data is sent as unsigned bytes, where the first byte is the pin to output on, the second is the number of times to repeat the signal, the third is the delay between subsequent repetitions and the actual timing data is the fourth byte onwards, until a zero byte is encountered.
Timing data are divided by 25 to give them a bit more range, as we usually need to wait more than 255 microseconds but don’t really need microsecond-level accuracy (the PWM data is at around 40 kHz). The delay data is similarly divided by 100, as we don’t need accuracy there either, so now we get timings that can be as high as ~6ms from a single byte.
As this scheme is pretty simple, it doesn’t need any parsing and can be used directly by the Arduino. The only problem is that I can no longer send data using picocom, because it’s not human-writable, so I wrote a small Python utility to do that. It’s pretty trivial, it uses PySerial to open a serial connection and send data to it:
com = serial.Serial("/dev/ttyACM0", 9600, timeout=0.2)
com.write(data + chr(0))
Of course, this evolved into a largish command-line utility to do lots of things like use a configuration file to store timing data, accept customizable code repeats, durations, etc.
Trying it out
I tested it with my RF sockets, and it works beautifully, apart from a small issue the Arduino has: Any attempt to connect to it over the serial port resets it, so you have to wait two seconds for it to finish booting before you can send data. Fortunately, there’s a pretty easy way to avoid this, and now transmissions are almost instantaneous.
Sadly, as I mentioned, I still haven’t managed to get my garage door to open, even though the signal I am sending looks identical to the one my remote sends. I must not be repeating the signal enough or with enough delay or something. If you know anything about this, please contact me and I will love you for ever.
Epilogue
The full utility (along with details and installation instructions) are available on GitHub: https://github.com/skorokithakis/ArduiRC/. Please feel free to fork/improve/hack on it and send me a pull request.
Also, if you have any feedback or suggestions, or have made something similar to this yourself, leave a comment below or get me on Twitter, I’d be glad to hear from you!

